Lab 1: Artemis Board and Bluetooth
This lab was divided into 2 parts over to course of two weeks to help us familiarize ourselves with the use of the Arduino IDE and Artemis board before learning how to work with the Artemis board over a bluetooth connection with a computer.
LAB 1A
Prelab
The Prelab for the first part of the lab was simply to download and install the most recent version of the Arduino IDE, and then to install the apollo3 libary from sparkfun by adding it to the libary manager using the json link found [here].
Lab
The bulk of Lab 1A was testing our ability to use the Arduino IDE to flash code to our Artemis board and run it. There were 4 example programs that were run to verify the functionality of specific parts of the board. These example programs would also be used in the future as a reference for what functions can be used to read data from and control various sensors.
1. Blinky
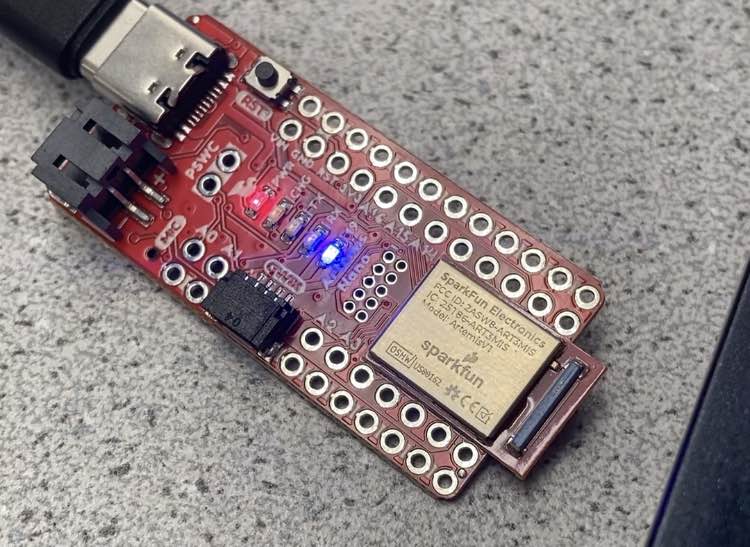
As is always the case when testing a new microcontroller board, the first test run was to blink a single LED. The “Blinky” example code was taken from the built-in-examples section of the Arduino IDE
2. Serial Monitor
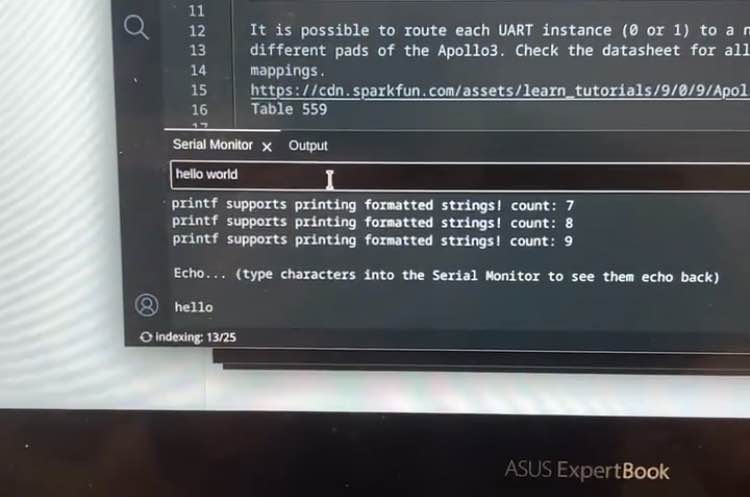
To test the functionality of the serial communication capabilities, I used the Example4_Serial code found in the Apollo3 library’s example section. This demo simply had the Artemis board recieve a serial commuications message in the form of a string, and then send back that same string in a second serial commication, causing a sort of echo.
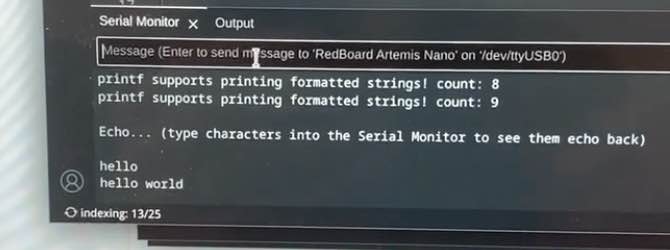
In this example, the computer sends the message “hello world”, through the serial monitor, and the message “hello world” is repeated back.
Computer sends serial message:
Artemis recieves and replys via serial message:
3. Temperature Sensor
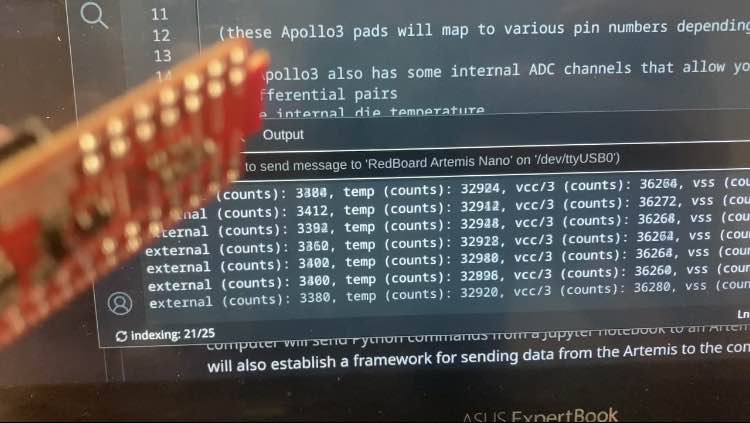
To test the temperature sensor, I used the Example2_analogread code found in the Apollo3 library’s examples. This demo would read the data from the temperature sensor and send it to the computer over serial communication.
To verify the temperature sensor was working, I looked at the background temperature readings and then held my finger over the board for a few seconds to warm it up.
Background Temperature:
Hand Temperature:
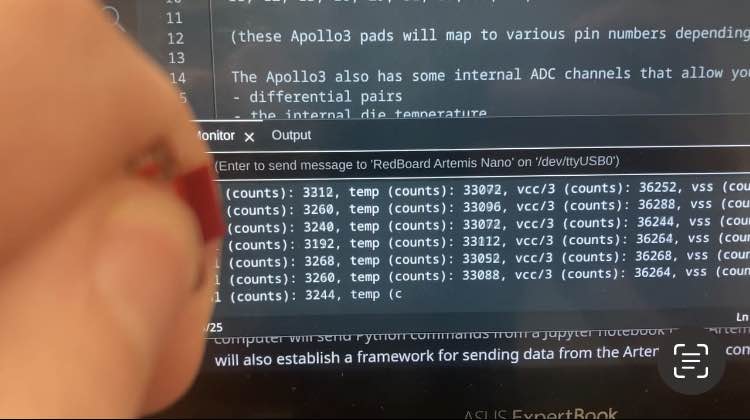 Over the course of about 4 seconds, the temperature went from 32924 units to 33088 units, proving my hand did warm up the sensor.
4. Microphone
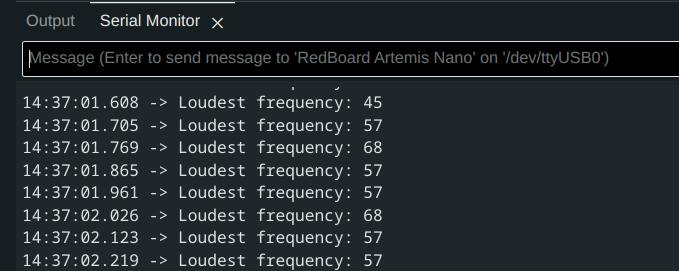
To test the microphone, I used the Example1_microphone code found in the PDM library’s examples. This demo would read the frequency data from the microphone and send it to the computer over serial communication.
Initially, when no overt sounds were being made, the microphone read the background frequency of the room to be between 50-60 hz.
Background Frequency:
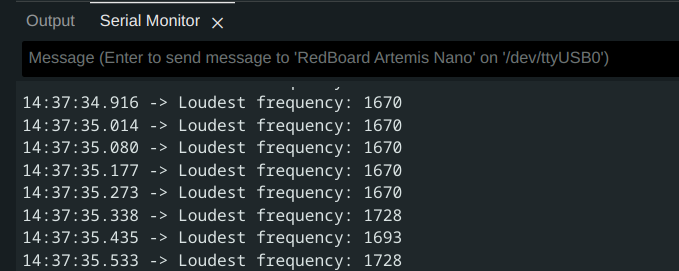
However, when I held the Artemis up and whistled into it, the loudest recorded frequency changed to around 1670 hz, confirming the microphone works.
Whistling Frequency:
LAB 1B
Prelab
The first part of the prelab was to set up a virtual environment so that we use jupyter notebook to write the commands to send to the Artemis
Python Installation
I already had a python installation on my machine, so I simply verified I was on the most recent version.
Virtual Environment
Following the instructions in the prelab, I created a new virtual environment by running the commands
python3 -m pip install --user virtualenv
python3 -m venv FastRobots_ble
in a terminal.
I could then activate the virtual environment by running the command
source FastRobots_ble/bin/activate
Once the virtual environment was activated, I then installed the required python packages by running the command
pip install numpy pyyaml colorama nest_asyncio bleak jupyterlab
Codebase
The codebase was downloaded from here, and extracted into the same folder as the virtual environment.
I then started jupyter lab by running
jupyter lab
Configuration
To connect my computer to the Artemis board over bluetooth, I needed to know the artemis board’s MAC address, I did this by burning the ble_arduino.ino program from the codebase onto the board. This would print the board’s MAC address over serial.
MAC Address and UUID:
 For some reason, the serial monitor did not register until I added an extra
 serial.print() statement right under serial.begin(), which is why there is a “hi” printed above the MAC address.
I also generated a Unique Universal Identifier (UUID) in a terminal window to ensure I would only connect to my board and not another student’s.
Once I had these two addresses, added them in the correct spots in both the jupyter lab file connections.yaml, and the BLE_UUIDs section in ble_arduino.ino
Connections.yaml:
artemis_address: 'c0:81:1c:26:21:64'

ble_service: 'fc457481-eb77-45bf-8ae5-ebad49aa0dce'

characteristics:
  TX_CMD_STRING: '9750f60b-9c9c-4158-b620-02ec9521cd99'

  RX_FLOAT: '27616294-3063-4ecc-b60b-3470ddef2938'
  RX_STRING: 'f235a225-6735-4d73-94cb-ee5dfce9ba83'
BLE_UUIDs:
//////////// BLE UUIDs ////////////
#define BLE_UUID_TEST_SERVICE "fc457481-eb77-45bf-8ae5-ebad49aa0dce"

#define BLE_UUID_RX_STRING "9750f60b-9c9c-4158-b620-02ec9521cd99"

#define BLE_UUID_TX_FLOAT "27616294-3063-4ecc-b60b-3470ddef2938"
#define BLE_UUID_TX_STRING "f235a225-6735-4d73-94cb-ee5dfce9ba83"
//////////// BLE UUIDs ////////////
Tasks
ECHO
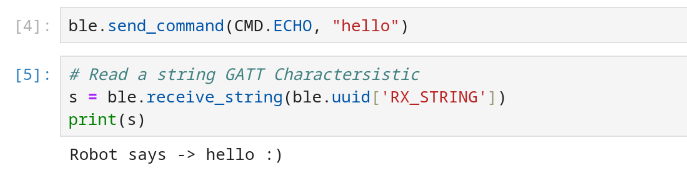
The funtion ECHO is designed to allow the Artemis board to receive a string sent from the computer over bluetooth and send back a string over bluetooth. It is important for the board to be both able to send and recieve data.
The function on the arduino side was written by modifying the given PING function to send the recived data back instead of just the message “pong”.
case ECHO:

            char char_arr[MAX_MSG_SIZE];

            // Extract the next value from the command string as a character array
            success = robot_cmd.get_next_value(char_arr);
            if (!success)
                return;

            /*
             * Your code goes here.
             */
            Serial.print("Robot says -> ");
            Serial.print(char_arr);
            Serial.println(" :)");

            tx_estring_value.clear();
            tx_estring_value.append("Robot says -> ");
            tx_estring_value.append(char_arr);
            tx_estring_value.append(" :)");
            tx_characteristic_string.writeValue(tx_estring_value.c_str());

            Serial.print("Sent back: ");
            Serial.println(tx_estring_value.c_str());

            break;
On the jupyter lab side, sending the command and receiving the reply looks like this:
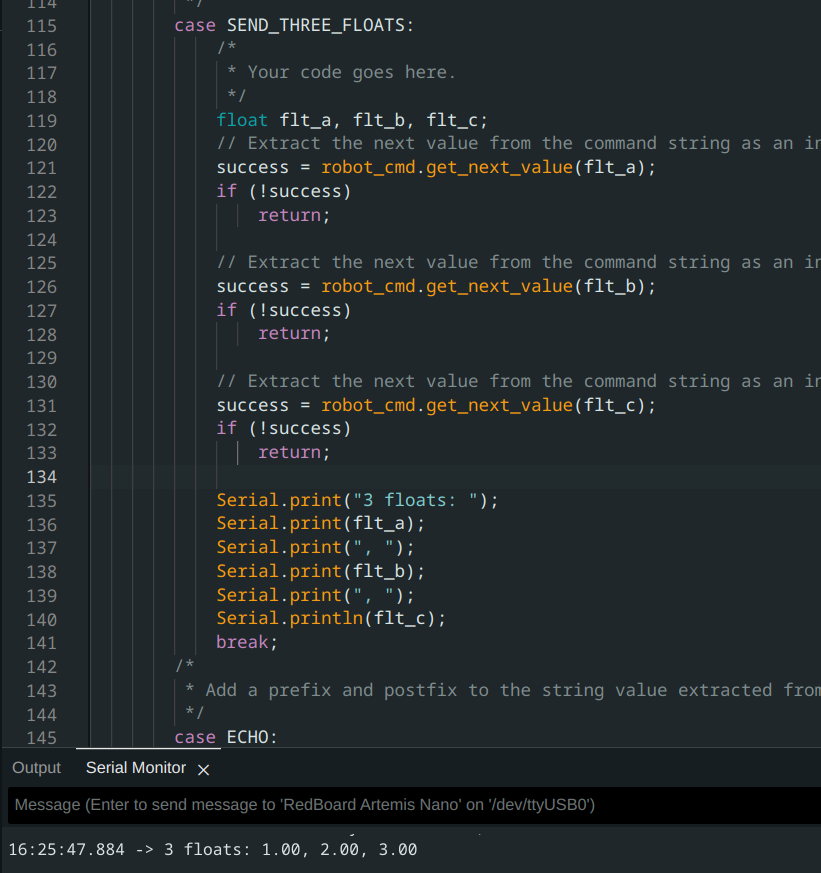
SEND_THREE_FLOATS
This funtion is a modification of the given command SEND_TWO_INTS, and was accomplished by simply adding an extra sent and recieve value, and changing the value’s type to float.
On the jupyter lab side it looks like this:

And on the arduino side it looks like this:
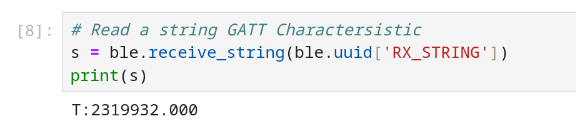
GET_TIME_MILLIS
Another important function for the board is to be able to send timestamps along side data. The GET_TIME_MILLIS function uses function millis() to access the onboard timer and send the current timestamp in a string, using similar code to the ECHO command.
On the arduino side:
case GET_TIME_MILLIS:
          float time_millis;
          time_millis = (float) millis();

          Serial.print("T:");
          Serial.println(time_millis);

          tx_estring_value.clear();
          tx_estring_value.append("T:");
          tx_estring_value.append(time_millis);
          tx_characteristic_string.writeValue(tx_estring_value.c_str());

          break;
In jupyter lab:
Notification Handler
The nofification handler is a function that is designed to work with the ble.start_notify function. The ble.start_notify function will call the notification handler every time a string message is recieved from the Artemis over bluetooth. At this stage of the lab, I created a very simple notification handler which would simply print out the string recived. Using the notification handler alongside ble.start_notify removes the need to call the ble.receive_string command in jupyter notebook every time we want to recieve a string.
The notification handler for this stage of the lab is this:
def notif_handler(uuid, bytes):
    a = ble.bytearray_to_string(bytes)
    print(f'current time is: {a}')
For reasons unkown to science, the notification handler only printed the messages under this cell:

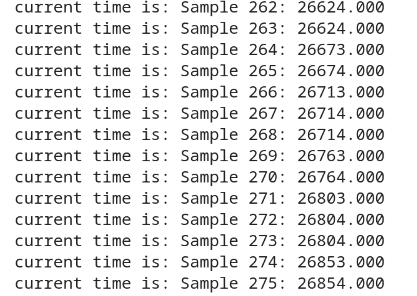
Looped GET_TIME_MILLIS
In order to get a baseline for how fast the Artemis board can send data, I created a loop to repeatedly run the code for GET_TIME_MILLIS for a period of around 5 seconds.
Artemis Board:
case TIME_DATA_LOOP:
            {
            int count = 0;
            unsigned long startT = millis();
            while (millis() - startT < 5000) {

                tx_estring_value.clear();
                tx_estring_value.append("Sample ");
                tx_estring_value.append(count);
                tx_estring_value.append(": ");
                tx_estring_value.append((float) millis());
                tx_characteristic_string.writeValue(tx_estring_value.c_str());
                count++;

            }

            Serial.println("Sent Data");

            break;
            }
Jupyter lab:
ble.send_command(CMD.TIME_DATA_LOOP, "")
This function managed to send 275 samples over a period of 4.971 seconds, meaning it had a data rate of around 55 messages a second
SEND_TIME_DATA
The function SEND_TIME_DATA first stores a list of timestamps in an array of length 256, and then loops through the array and sends all the entries as fast as it can. This is a different method used than in TIME_DATA_LOOP, since the data is not being sent in “real_time”, but is instead being collected and then sent in seperate loops. The fact that a message does not have to be sent between each timestamp should significantly improve the frequency of the timestamps, and the fact that the messages don’t have to wait for a timestamp in between them should increase the frequency of the messages.
Artemis Board:
case SEND_TIME_DATA:
          {
          int i = 0;
          unsigned long startT = millis();

          while (i < data_array_size) {

              time_data[i] = (int) millis();
              i++;

              if(i == data_array_size-1)
              Serial.println("OoM");

          }
          for (int j = 0; j < data_array_size; j++) {

              if(time_data[j] == 0)
              break;

              tx_estring_value.clear();
              tx_estring_value.append("Sample ");
              tx_estring_value.append(j);
              tx_estring_value.append(": ");
              tx_estring_value.append(time_data[j]);
              tx_characteristic_string.writeValue(tx_estring_value.c_str());

          }

          Serial.println("Sent data");

          break;
          }
The time_data array was created as a global variable at the top of the file:
const int data_array_size = 256;
int time_data[data_array_size];
Jupyter Lab:
ble.send_command(CMD.SEND_TIME_DATA, "")
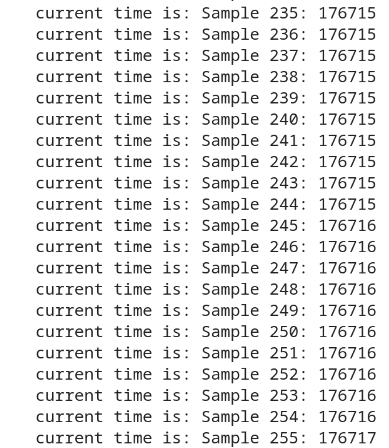
This function was able to send 256 timestamps that ranged from 176717ms to 176683ms. The means it has the ability to store timestamp data at almost 7530 messages per second, as long as it sends that data asynchronously.
GET_TEMP_READINGS
This function is almost identical to SEND_TIME_DATA, with the only difference being that an array of temperature values is also being recorded and sent alongside the timestamps.
Artemis Board:
case GET_TEMP_READINGS:
          {
          int i = 0;
          unsigned long startT = millis();

          //Build the Array
          while ( i < data_array_size) {

              time_data[i] = (int) millis();
              temp_data[i] = getTempDegF();
              i++;

              if(i == data_array_size-1)
              Serial.println("OoM");

          }
          for (int j = 0; j < data_array_size; j++) {

              if(time_data[j] == 0)
              break;

              tx_estring_value.clear();
              tx_estring_value.append("Sample ");
              tx_estring_value.append(j);
              tx_estring_value.append(": Temp is ");
              tx_estring_value.append(temp_data[j]);
              tx_estring_value.append(" at time ");
              tx_estring_value.append(time_data[j]);
              tx_characteristic_string.writeValue(tx_estring_value.c_str());

          }

          Serial.println("Sent time many times");

          break;
          }
The temp_data array was created as a global variable at the top of the file:
int temp_data[data_array_size];
Jupyter Lab
ble.send_command(CMD.GET_TEMP_READINGS, "")
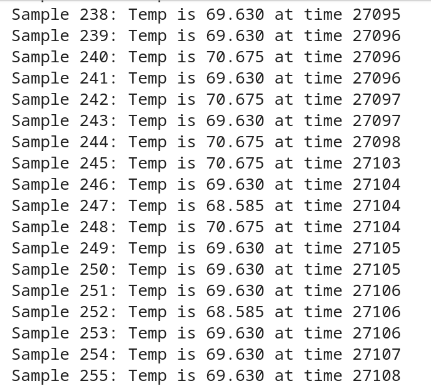
This was able to store 256 samples over the course 213 ms, giving a store rate of 1201 messages per second.
Advantages and Disadvantages
The method of sending data used by TIME_DATA_LOOP sends data much slower and has a much larger gap between timesteps, which means it cannot send high-resolution data. However, it has the advantage that every data sample sent is the most recent sample, which means this is the method of choice when data needs to be sent “live” and the quality of the data matters less.
The second method has a much higher resolution, which both SEND_TIME_DATA and GET_TEMP_READINGS being able to collect over a thousand samples a second, compared to the 50 samples per second resolution of TIME_DATA_LOOP. However, this method has two prominent disadvantages. The first is that this data needs to be collected and sent in two separate steps, which means this cannot be used for sending data in anywhere close to “real time”. The second disadvantage is that this requires the storage of the data in arrays in memory, of which there is a limited amount. In the functions created for this lab, we used one array of ints (1 byte each) for the timestamps, and one array of doubles (8 bytes each) for the temperature data. Given that the Artemis board only has 384kB of memory, this method could only store 32768 entries of temp data with associated timestamps.
Discussion
This lab introduced us to the Artemis board and how to send commands to it over bluetooth, which will be vital in commanding the robot. This lab also introduced us to the Arduino IDE and jupyter lab which will be the two main tools used for programing the robot.